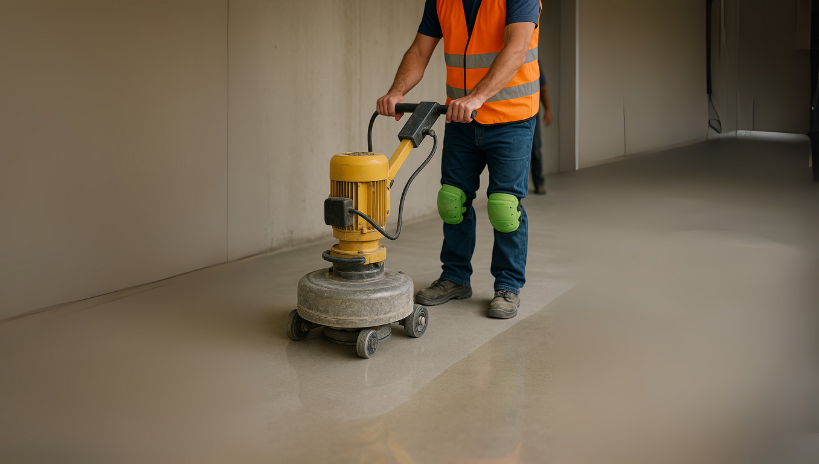
Polishing concrete floors can turn dull, dusty slabs into sleek, glossy surfaces that are durable, low-maintenance, and visually appealing. Whether you’re aiming to DIY or hire a professional, this guide walks you through both DIY and professional methods of how to polish concrete with step-by-step instructions, tools needed, and expert tips.
What Is Concrete Polishing?
Concrete polishing is a mechanical process of grinding and polishing that uses specialized machines equipped with diamond abrasives. The process smooths the surface, removes imperfections, and increases the floor’s sheen from matte to a high-gloss finish.
Benefits of Polished Concrete Floors
- Cost-effective over time
- Durable and long-lasting
- Stain- and moisture-resistant
- Low maintenance – just sweep and mop regularly
- Stylish look for homes, offices, and industrial spaces
When to Polish Your Concrete Floor
Before knowing how to polish concrete, it is important to know the reasons behind it. Here are the signs that your concrete floor requires polishing:
- If you see fine concrete dust on the surface, it means that the top layer is breaking down. Polishing makes the floor denser, which keeps dust from forming.
- When the floor loses its natural sheen and looks clouded or faded, it means that the polish layer has worn away. Polishing brings back the shine and life to the surface.
- If some parts of the surface feel rough or patchy underfoot, it could mean that the surface has been worn down unevenly. Polishing makes these rough spots smoother and makes everything look more even.
- Scratches and stains that are easy to see. Polishing can get rid of or make less noticeable marks left by foot traffic, spills, and abrasions. A polished surface is better at keeping harm from happening in the future.
DIY Method in 2026: How to Polish Concrete Floors at Home
Polishing concrete yourself is best for small to medium areas and when you’re on a budget. Here’s how to do it:
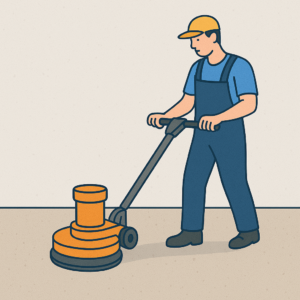
Step 1: Prepare the Area
- Clear the floor of all furniture, rugs, and debris.
- Cover walls and trim with plastic sheets.
- Clean thoroughly using a broom, vacuum, and mop.
Tip: Use a degreaser if the floor has oil or grease stains.
Step 2: Inspect and Repair the Surface
- Look for cracks, holes, or uneven areas.
- Use a concrete patching compound to repair damaged areas.
- Allow it to dry completely (follow manufacturer instructions).
Step 3: Choose Your Equipment
You’ll need:
- A concrete grinder/polisher (rented from a hardware store).
- Diamond polishing pads (start from 30 grit and go up to 3000 grit).
- Hand grinder for edges.
- Dust mask, goggles, knee pads.
Step 4: Start Grinding (Rough Grinding Phase)
- Begin with a 30- or 40-grit metal-bonded diamond pad.
- Move the grinder in overlapping circular motions.
- Vacuum the dust after each pass.
Step 5: Progress Through Finer Grits
Repeat the grinding process using:-
- 80-grit
- 150-grit
- 300-grit resin-bonded pads
Tip: The higher the grit, the shinier the finish.
Step 6: Apply a Concrete Densifier
- Once you’re done with 150 or 300 grit, apply a concrete densifier.
- It hardens the surface, filling pores for a smoother polish.
- Let it dry for at least 12 hours before moving on.
Step 7: Final Polish
- Switch to resin-bonded pads (800, 1500, and 3000 grit).
- Polish in the same overlapping motion.
- Use a high-speed burnisher for extra gloss (optional).
Step 8: Seal the Surface (Optional but Recommended)
- Apply a penetrating concrete sealer with a roller or sprayer.
- It adds a layer of protection against stains and wear.
- Let it cure as per instructions before walking on it.
Professional Method: How Pros Polish Concrete
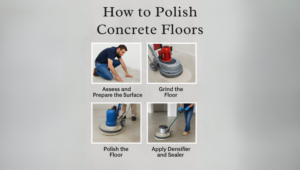
Though you know about “how to polish concrete,” you still need professional help in some places. Professional concrete polishing involves industrial-grade equipment and is more suitable for large commercial floors or high-end residential finishes.
Pro Steps Overview:
- Surface Preparation
-
-
- Industrial vacuums shot blasting or scarifying for old coatings
-
- Heavy Grinding
-
-
- Begin with 16 or 30 grit using a planetary grinder
-
- Repairs and Joint Filling
-
-
- Use polyurea or epoxy fillers for expansion joints and cracks
-
- Medium Grinding and Densifying
-
-
- Move to 80/150/300 grit; apply densifier mid-process
-
- High Grit Polishing
-
-
- Finish with 800, 1500, and 3000 grit
-
- Final Buff and Seal
-
- Use a burnisher or propane buffer
- Apply commercial-grade stain guard or sealer
Note: Professionals may also offer staining, scoring, or decorative patterns as custom options.
When Should You Hire a Pro?
- Large commercial spaces
- Designer finishes or dyes
- Floors with major cracks or damage
- When time and precision matter more than cost
Tools and Materials Needed (DIY vs. Pro) in 2026

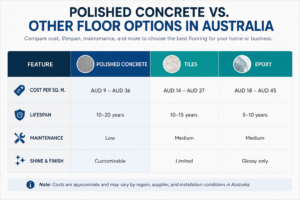
Polished Concrete vs. Other Floor Options in Australia
Latest Maintenance Tips for Polished Concrete Floors
- Dust mop daily to remove grit
- Avoid wax or harsh chemicals
- Wet mop weekly with pH-neutral cleaner
- Reapply sealer every 2–3 years (if needed)
Final Thoughts
Whether you go the DIY route or call in the pros, polishing your concrete floor adds beauty, durability, and value to your space. For budget-conscious homeowners, DIY is very doable with patience and the right tools.
But if you’re after a showroom-quality finish, hiring professionals like Civilcraft will ensure a flawless result. Civilcraft offers one of the best concrete resurfacing in Sydney. So, let your floors shine, literally!
FAQs
Q: How to Polish Floors?
Ans: To polish floors, start by cleaning the surface thoroughly to remove dust and grime. Use a floor-specific polish (based on whether your floor is tile, wood, or marble), applying it evenly with a mop or cloth. Let it dry completely, then buff with a floor buffer or microfiber cloth to restore shine. Repeat regularly to maintain a glossy, smooth finish.
Q: What is concrete floor polishing and why is it done?
Ans:- Concrete floor polishing is the process of grinding and sealing concrete to create a smooth, glossy, and durable surface. It enhances appearance, improves strength, reduces dust, and requires less maintenance compared to untreated concrete floors.
Q:- What are the benefits of polishing concrete floors?
Ans:- Polishing concrete floors makes them smooth, durable, and shiny while reducing dust. It enhances appearance, requires low maintenance, and lasts for years.
Q: Can I polish old concrete?
Ans: Yes, but it must be structurally sound; repair cracks before polishing.
Q:- How do I polish concrete at home?
Ans:- Polishing concrete involves cleaning the surface, grinding with coarse diamond pads, smoothing with finer grits, applying a densifier, and finishing with a polishing pad.
Q:- What tools are needed to polish concrete?
Ans:- You need a concrete grinder or polisher, diamond grinding pads of various grits, a densifier, vacuum, and safety gear like goggles and gloves.
Q: How long does it take to polish concrete?
Ans: DIY jobs take 1–2 days for a small room. Professionals may take a day for 1000+ sq. ft.
Q: Does polished concrete get slippery?
Ans: Not usually. Despite the glossy look, it’s safe under dry conditions. You can add anti-slip grit to sealers.
Q: What’s the cost of DIY polishing?
Ans: Around AUD 2–10/sq. ft., depending on rentals and materials used in the construct civil work.
Q: Can I polish outdoor concrete?
Ans: Yes, but use weatherproof sealers and consider matte finishes to reduce slipperiness when wet.